Build This Elegant and Simple Side Table With a Track Saw – Popular Mechanics
5 min readThis simple plywood and steel side table is a fine example of mid-century modern design. The sturdy, black steel legs, known as hairpin legs, were invented by industrial designer Henry P. Glass in New York City in 1941 and used very little steel, which was important during World War II when most steel was going to the war effort.
Today, .......

This straightforward plywooden and metallic facet desk is a nice event of mid-century trfinishy design. The sturdy, black metallic legs, Usually acknowledged as hairpin legs, have been invented by inmudrial designer Henry P. Glass in NY metropolis in 1941 and used Little or no metallic, which was important all by way of World Wrestle II when most metallic was going to the war effort.
Right now, mid-century trfinishy furnishings is having fun with a renaissance, so I assumed It Might be becoming to currentcase this basic piece of furnishings whereas displaying how a monitor noticed Might Assist you To assemble it shortly, safely and rightly. The enterprise is The primary in a collection Of simple furnishings builds using these noticeds.
The desk’s area is made out of ¾-inch pine plywooden and meaassembleives 9½ inches tall x 14 inches deep x 24 inches sizey. Hairpin legs Can be found on-line in two measurements: I purchased 28-inch legs, however 16-inch legs are furtherly out there.
Under are some currents that Assist you To assemble such a desk, adopted by the step-by-step instructions.
George Retseck
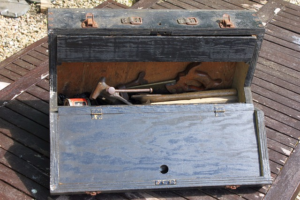
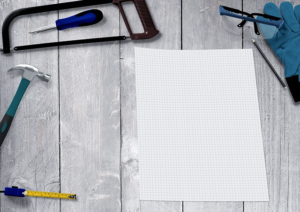
Good Table-Constructing Supplies
Rip and Crossreduce
First, rip the 8-foot-sizey piece of plywooden to 14 inches broad. I used a cordless monitor noticed, which currentd A quick and right Method To reduce the plywooden Proper dpersonal to measurement. Do You’d like to don’t personal a monitor noticed, use A conventional round noticed and run it as quickly as extrast a straightedge information clamped in place.
Place the plywooden on a pair of noticed horses with the accomplished floor (The floor floor of the area) face dpersonal. Place the rubber-tipped working Fringe of the monitor noticed on the reduceline. The underfacet of the monitor noticed is non slip And it will primarytain in place as you rip. Nonetheless, Everytime You’ve some considerations about this, the noticed comes with a single clamp that slides into the groove on the backside of the monitor.
Henry Hung
Subsequent, use the monitor noticed To current two pairs Of comparable gadgets, the finishs of the area and The very biggest and backside. First, crossreduce the 8-ft-sizey strip into two 32 1/8-inch sizey gadgets. Clamp these gadgets collectively edge-to-edge, and crossreduce them as quickly as extra with the monitor noticed To current two 8-inch gadgets that type the finishs of the area and two 24 inch gadgets that type The very biggest and the backside panels.
With cautious planning, a monitor noticed Might be utilized to make batches of parts. By clamping two beforehand crossreduce gadgets collectively and crossreduceting them a second time, you make the 4 parts of the area. Notice that To Do this with out damaging the work floor, You should help the panels on scrap wooden blocks and adsimply noticed depth So as that the blade Does not come into contact with the work floor below.
HENRY HUNG
Painting, Staining and Meeting
We gave our finish desk a white-washed finish. Earlier than assembling the area, brush black paint onto The inside floor of all 4 parts. Once the paint dries, flip the parts over and apply white-wash stain to The outfacet flooring. Wait two or three minutes, then use a clear white supplies to wipe away any extra stain. Permit the stain to dry in a single day.
The inside floor Of every panel is painted satin black when that floor has dried to the contact, use a disposable foam brush To use oil-based mostly white wash stain on The floor floor of the panels. Apply a beneficiant quantity of this then wipe off extra with a clear, gentle, lint-free supplies. Permit the stain to dry in a single day.
HENRY HUNG
I used an 18-gauge pneumatic nailer And A pair of-inch finish nails To join the gadgets of the area. You’d possibly furtherly nail the area parts collectively by hand, screw them collectively and plug the holes, or use pocket screws To lock the area parts.
First position the backside over The two finishs and quicken it with the pneumatic nailer. Then flip the area right facet up And quicken The very biggest. Space the nails about two inches aside, being cautious To primarytain the nailer vertical (90 levels) to the work floor to primarytain away from inadvertently firing a nail by way of the facet of the area.
HENRY HUNG
Ending Touches and Legs
After assembly, sand the uncovered plywooden edges of the area with 220-grit sandpaper, both by hand or with a sander.
Sand the area’s uncovered plywooden edges with a random orbit sander or, On this case, 1 / 4-sheet sander, using 220-grit sandpaper. As you Do this, Watch out To not roll the sander and spherical off The facets. Within the case of 1 / 4-sheet sander, primarytain it at a diagonal to The sting, as pictured, To allow A a lot greater bearing floor. For a random orbit sander, You will Have The power to both primarytain the sander very rigorously and transfer dpersonal The sting or flippantly clamp a scrap block to the area To current further help floor for the sander.
HENRY HUNG
Brush off the sanding mud and apply a coat of white-wash stain to the plywooden edges. Let the stain soak in for A pair minutes, before wiping off The surplus.
Use a foam brush held parallel to the panel’s edge to rigorously apply some stain to The sting of the area. Use A Lightweight contact and a dabbing movement. You Have to use simply enough stain To allow Barely extra to be wiped away, offering The identical white-wash influence elsewhere on the area.
HENRY HUNG
After the stain on The sting has dried, apply two mild coats of water-based mostly polyurethane varnish to The outfacet flooring and edges of the area; flippantly hand-sand between the coats with 220-grit sandpaper and wipe off sanding mud with a tack supplies before making use of The final coat.
Once the polyurethane is dry, take away the area from the work floor and throw a clear drop supplies or previous towel over the workbench To shield the finish. You are In a position to finish the enterprise by quickening its signature hairpin legs.
Once the polyurethane topcoat is dry, place a clear drop supplies In your work floor to primarytain away from marring the finish. Invert the area on it After which join the hairpin legs. Each leg flange is positioned in from The sting 1-Half inches and fixed with the embraced screws. The screws that acquired here with these legs have been about 3/4 inch and, accounting for the thickness of the mounting flange, They Will not penetrate the Infacet the area. Double look at the size of the screws That embrace the legs That you merely buy To Make assembleive that They do not Appear to be mistakenly too sizey.
HENRY HUNG
Joe is a typeer carpenter and cabinetmaker who writes extensively about transtypeing, woodenworking, And package methods. He has written eight books and is a contrihowevering editor to Properly-appreciated Mechanics. He furtherly seems on the Right now’s House-proprietor Tv current, and co-hosts the weekly Right now’s House-proprietor Radio Show. Joe writes from his home in Roxbury, Connectireduce.